
Planet Zoo 2 Terrain, Biomes, and Natural Scenery
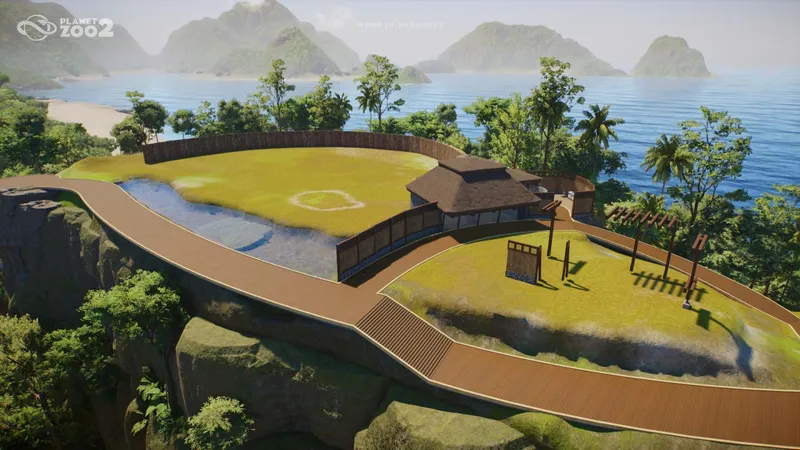
A reliable order for shaping a zoo
Lay out the habitat, visitor paths, gates, and staff access first. Shape the ground, then add terrain paint, plants, and scenery. Choose the habitat biome before planting. Shape the ground with terrain tools, then pick foliage and scenery that match the biome shown in the build browser.
1. Reserve the habitat and route space
Sketch the enclosure footprint, visitor paths, gates, and room for staff access before raising or lowering large areas. Check the current map and the species you intend to house; a visual biome match alone does not prove that the habitat meets the animal’s needs. Leave room to adjust slopes and paths after the enclosure boundary is in place.
2. Shape the ground before adding detail
Use the terrain tools to create the broad landform first: level areas for buildings and routes, gentle slopes where paths need to connect, and any hills or depressions that define the habitat. Then use terrain paints to vary the visible ground surface. Make small passes and inspect the result from visitor height as well as from the overhead build view; narrow path connections and enclosure edges are easy to obscure with heavy sculpting.
The official feature page confirms terrain brushes, but the reviewed official public guides do not provide a complete table showing which terrain paints are available on every map or biome. If a paint is missing or unavailable, check the current terrain tool in your build and the map’s settings rather than assuming a universal unlock or a workaround from the original Planet Zoo.
3. Layer foliage, then check welfare
Add plants and rocks after the ground shape is stable. Frontier describes new foliage tools, and AltChar reports that grouped plants and rocks can be painted across an area. Use that as a time-saving decoration method, then inspect the actual habitat readout for the selected species. The public sources reviewed do not establish one universal “green cover” percentage: ground coverage, plant suitability, shelter, temperature, terrain, and other needs may be presented separately in the game.
Treat any foliage brush as a placement aid, not proof that the habitat is suitable. Reopen the animal’s habitat information after changing terrain or plants and resolve the warnings it currently shows. If an animal’s needs call for a different biome or plant set, follow its in-game requirements rather than the scenery theme you prefer.
4. Finish with a scenery theme
Frontier lists multiple geographic biomes and describes four new plus five returning scenery themes. These are different choices: a biome describes the environmental setting, while a scenery theme describes a style of construction pieces. Pick the theme for visual coherence after the layout and welfare checks; mixing decorative styles does not change the animal’s habitat requirements.
Controls that need an in-game check
The official sources reviewed here do not confirm a specific random-rotation key or setting, a universal green-cover threshold, or a stable menu path for a terrain-painter update. Open the current Build-mode terrain or foliage tool and read its on-screen controls. For species thresholds, use the habitat panel for the animal in that zoo. Search results about the original Planet Zoo are not reliable evidence for Planet Zoo 2’s current controls.
Quick checklist
- Reserve habitat, paths, gates, and staff access before sculpting.
- Shape broad landforms first; apply surface paints and foliage afterward.
- Use the selected species’ habitat panel to verify needs after edits.
- Treat biome and scenery theme as separate choices.
- Confirm rotation, paint availability, and any coverage threshold in the current game UI.
- 01
Reserve space
Leave room for the habitat and visitor route.
- 02
Shape the ground
Sculpt terrain before adding decorative detail.
- 03
Finish and review
Layer foliage, then check habitat needs.
Related guides
Sources
- [1]Features — Planet Zoo 2 — Frontier Developments
Official feature page describing multiple biomes, scenery themes, foliage and terrain brushes.
- [2]Building Your Zoo — Player Guide — Frontier Developments
Official construction and pathing guide.
- [3]Animals — Player Guide — Frontier Developments
Official guide for animal needs and habitat checks.
- [4]Planet Zoo 2 review — AltChar
Independent review describing terrain shaping, biome painting, and the grouped foliage brush.
Was this helpful?
Thanks for the feedback!